Fitting roller blinds could be the perfect solution to block out the sunlight for a better night’s sleep, add a touch of elegance to your living room, or keep your rooms warm in the winter and cool in the summer.
Roller blinds are a versatile and cost-effective option. They are an excellent choice for any room, from bedrooms and bathrooms to kitchens and offices, due to their sleek design, ease of use, and minimal maintenance requirements. To help you get the best results, we’ve covered all the main aspects of the installation process.
Table of Contents
What you will need for the fitting
Before you start, make sure you have these tools and feel familiar with how to use them. Additionally, having all materials at hand will save you time and prevent unnecessary interruptions.
- Tape measure
- Pencil
- Drill
- Screwdriver
- Level
- Step ladder
- Protective glasses and gloves
- Roller blinds
- Mounting brackets (usually included with the blinds)
- Screws (usually included with the blinds)
- Wall anchors (if mounting into drywall)
Important safety tips
To avoid any injuries while fitting your blinds, you can follow some simple rules:
- Make sure your ladder is stable and positioned on a flat surface.
- Wear protective glasses and gloves while drilling the wall.
- Don’t forget to attach a safety device to keep cords out of reach for children and pets and prevent accidents.
Check also:
How to Install a Dimmer Switch
Preparing for the blind fitting
Before you start the blinds installation process, take your time to do a little preparation work.
- Read the instructions – Every roller blinds set comes with specific instructions. Read them thoroughly before you begin.
- Check the box content – Check if all the fixtures listed in the instructions are in place.
- Clear the area – Remove any obstacles near the window to give yourself plenty of room to work.
Decide on inside vs. outside recess installation
When fitting roller blinds, choosing between an inside recess and an outside recess is crucial. Here’s what we mean…
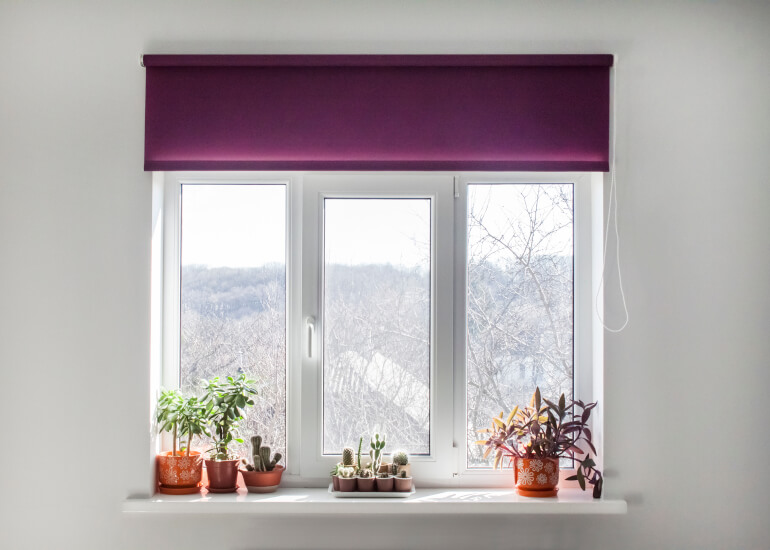
Inside the recess
Fitting the blinds right next to the window, also known as within the recess, is a great option if the recess depth is at least 7.5 cm, so there is enough room for the blind. So, before you choose this method, carefully measure your window. To measure for a blind inside the recess, you need to measure the width and height within the recessed space that the window fills.
- Advantages: Offers a cleaner look, preserves the window trim, and allows for additional window treatments like curtains.
- Installation tips: Ensure there’s enough depth within the frame to accommodate the brackets and the rolled-up blind.
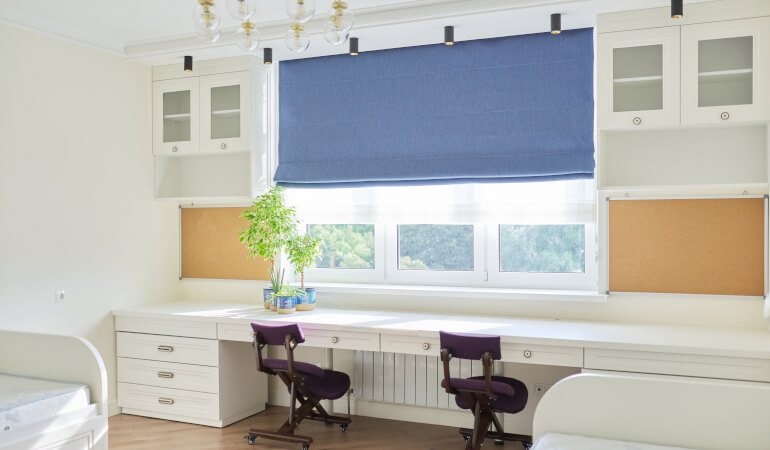
Outside the recess
This method of hanging blinds places the blind outside of the window recess. The blind will, therefore, cover the entirety of the window recess and a small amount of surrounding space to ensure light doesn’t spill around the edges. To measure for a blind outside the recess, you need to measure the height and width of the space from which the recess starts.
- Advantages: Ideal for windows with shallow frames, can make a window appear larger, and provides better light control.
- Installation tips: Make sure the surface is flat and levelled. Use a level to mark the bracket positions.
Check also:
DIY Guide: Fitting Your Venetian Blinds Correctly
Take all necessary measurements
To ensure your blinds fit perfectly and will function well, you have to do precise measurements and here’s how to do it:
- Window handles: If handles protrude, measure and mark the bracket’s position to position the blinds away from the window to avoid interference.
- Locks and cranks: Position the blinds to either side of the obstruction or use extension brackets if necessary.
- Ceiling fit: If you can’t install your blinds inside or outside the recess, you may need to fit them on the ceiling above the window. To do this, carefully measure the width of your window, use a spirit level, and mark this point. Then, divide the length into two for the left and right sides of your blind brackets.
- Maximum light control: To get better results and reduce the light bleed as much as possible, you need to fit the blinds as close to the window glass as possible.
- Blinds fitting on uPVC window: If you need to fit your blinds on uPVC windows, always try to fix the blinds to the plaster above the windows. But if you have no other option, you can still use a masonry drill on the uPVC and fit as normal.
- Double-check: Verify your measurements to avoid any drilling mistakes.
Check also:
Guide to Enhancing uPVC Door Security: Tips and Best Practices
Install the brackets
Now that you have made all the decisions for inside or outside recess installation and have taken into account all measurements, it’s time to start the installation process. The brackets are crucial for holding your blinds in place. Here’s how to install them:
1. Mark the position
Depending on whether you go for inside or outside recess fitting, measure and mark the position where you will attach your blind brackets using a pencil, evenly aligning them in or above the window frame.
The level line should go at least 4 to 5 cm above the window, but you can adjust it based on the design of the roller blinds and your personal preference. Note that you should not screw directly into a frame of a vinyl window, so an inside fit is better suited for a wooden frame.
2. Drill pilot holes
Using an electric drill and a masonry bit, create the fixing holes and install the wall anchors. Avoid drilling too close to the edge of the brickwork or plasterboard; maintain at least a 50 millimeter clearance for safety and efficiency.
If you’re attaching the roller blinds to a wooden frame instead of masonry, use a bradawl to make the hole. In this case, drilling and wall plugs are unnecessary. Be sure to remove any small debris from the drilled holes for a cleaner finish.
3. Attach the brackets
Secure the brackets to the wall or window frame using the screws provided. If you’re mounting into drywall, use wall anchors for extra support.
Check also:
How to Install Vertical Blinds Properly
Attach the roller blinds
With the brackets in place, it’s time to attach the roller blinds:
- Insert the blinds – Once you have screwed up the brackets, put the pin end into the bracket. Then, lift the control end and insert it into the opposite bracket, ensuring the plugs click into their corresponding slots. Finally, put the bracket covers to make everything nice and neat.
- Secure the blinds – Depending on the design, you may need to tighten screws or clips to hold the blinds in place.
- Attach the child safety device – This step is only necessary for roller blinds with a chain. Attach the p-clip over the chain and secure it at the bottom. Ensure it is tight enough to stay on the clip and close to the wall but not so tight that the chain can’t move. Mark a hole, drill into it, and screw it into place.
Check also:
Why is installing a child safety device so important?
Blinds with cords and chains pose a serious strangulation risk for toddlers and pets. To mitigate this danger, it’s crucial to install the provided safety device immediately after fitting the blinds.
Since February 2014, all blinds produced and sold in the UK must comply with specific child safety requirements (BS EN 13120). In 2018, these safety standards were further tightened. The “Make It Safe” campaign, led by the British Blind and Shutter Association (BBSA), promotes awareness of cord safety and encourages the use of either cordless blinds or blinds with built-in safety features.
Check also:
5 Essential Steps for Perfectly Fitting Your Roman Blinds
Test and adjust if needed
Now that your blinds are up, it’s time to test them. Pull the blind down to check its level and operate smoothly and evenly. Roll them up and down several times to guarantee smooth operation.
If the blinds don’t roll properly or get stuck at the halfway point, you may need to tighten the brackets until they function correctly.
There’s no need to go through this laborious process. Leave the blind fitting to a specialist!
Enter your postcode to view our rates and availability in your area.
For questions about the services we offer visit our main site
Maintain and clean properly
Proper maintenance will extend the life of your roller blinds. Use a duster or a soft cloth to remove dust on weekly basis. For stains, use a damp cloth and mild detergent. Avoid harsh chemicals as they can damage the blinds’ material.
Note: You can also turn to a professional curtain and blind cleaning expert to handle the job. By choosing this option, you can rely on their extensive experience and knowledge about the different fabrics and how to clean them.
Common installation mistakes to avoid
Avoid these common pitfalls to ensure a successful installation:
- Incorrect measurements: Double-check your measurements before you start drilling the wall for the brackets.
- Skipping the instructions: Each set of blinds may have unique installation steps. You may damage the blind’s mechanism if you put them incorrectly.
- Not having the right tools: If you don’t have the right tools or feel that the chances of screwing up the installations are too high, you better turn to a professional handyman.
Takeaways
- Remember to gather all necessary tools and materials before starting and take precise measurements to ensure a perfect fit.
- Decide whether an inside or outside recess installation suits your window best and consider any obstructions.
- Follow the instructions carefully, install the brackets securely, and attach the blinds properly.
- Lastly, always prioritise safety by installing the child safety device to prevent accidents. With these steps, you’ll achieve professional results and enjoy all the benefits of your new roller blinds.


Leave a Reply